Blizzard Blademaster Boss Guide
Optional, Meigu Lake ruins. Bring summons that ignore freeze, or rock the stick to break the ice. Drops Whiteshadow.
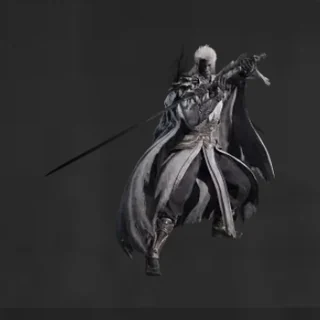
At a glance
| Region | Meigu Lake — Phantom Illusionist Ruins |
| Type | Masters (human master, no Transcension — just steel and technique) |
| Drop | Whiteshadow (main weapon) |
| Requirement | Optional |
Getting there
He waits at the end of the Phantom Illusionist Ruins, in the frozen northwest of Meigu Lake — an optional stop, but one behind a long chain of prerequisites.
The gate is four Acolyte masks. The ruins do not open until you have all four:
| Mask | Where |
|---|---|
| Blazing Mask | Scarecrow in the northern farming fields of the Village of Lu |
| Thunder Mask | Southwestern cliffs of Pangzhen — needs the Dormant Flaming Mane to reach |
| Venom Mask | Scarecrow on the eastern island of Meigu Lake, by the east dock |
| Frost Mask | Open the Crimson Manor with the Puppet’s Tongue; drops from the Puppet Scavenger fight |
With all four in hand, take the boat to the frozen fishing village in northwestern Meigu Lake, activate the Four Guardians’ Mirror bell, and use the masks on the mirror. The passage leads through floating structures and ruined platforms, then down the Forbidden Path to him.
Moves and how to answer them
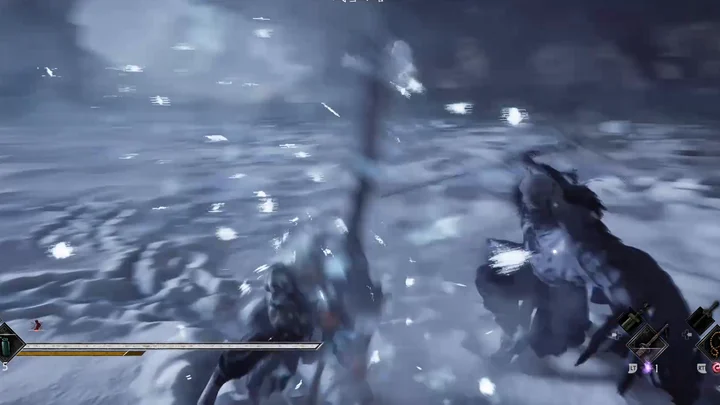
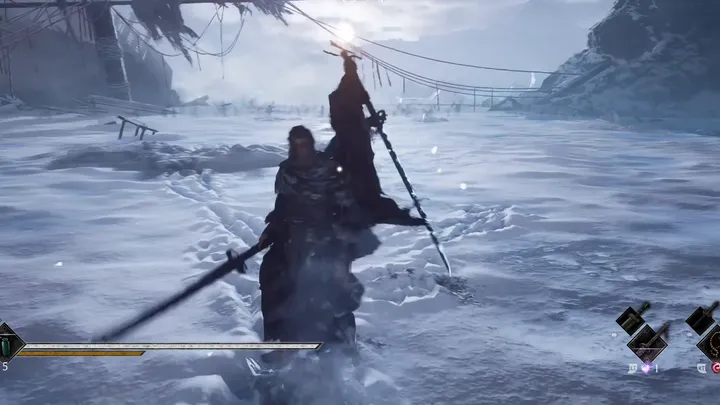
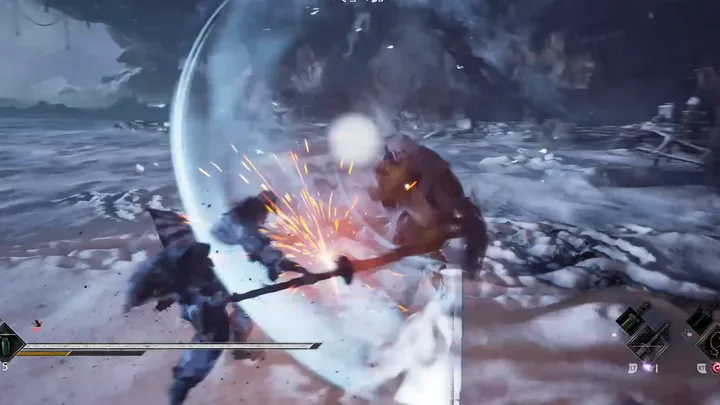
The frost burst. He plants and raises the blade first — that pose in the left frame is the only warning. The ice erupts on the swing itself, so the answer is to be out of the circle before he brings it down, not to dodge after the crystals appear. The third frame is still expanding: the recovery is later than it looks, which is why trading into the tail of this move gets you frozen.
Two timing notes that matter more than gear. When he charges up, the second attack after it is the red one — perfect dodge that, not the first. And the very first attack of the fight is one you have to learn right there: it can be dodged at the last moment, and it comes back later in the fight, so treat the opening exchange as the tutorial for it.
How to fight him
The one mechanic that matters
Everything he does that hurts is built on freeze.
There is no accessory in the game that makes you immune to it. You cannot build the status away. That single constraint decides the whole approach to the fight: either you prevent the freeze from mattering, or you shorten it.
Answer 1 — bring summons that do not care
The Kuye Temple Prayer Beads, taken to full Soul Temper, summon three living bronze monks that do not take status effects at all. Freeze does nothing to them.
The pattern:
- Open by summoning.
- Let them take the aggro and do the damage.
- Stay behind and keep swapping weapons to fire skills — every swap refills Sha-Chi, so the rotation never stalls.
- When they expire, summon again.
Pair it with two accessories from the side quest line — one doubles what the summons output, the other keeps them on the field longer. That combination is what pushes the build from “helpful” to “the fight is over”. Weapons and draughts barely matter in this setup; take whatever is strongest.
The numbers behind it
| Piece | What it actually does |
|---|---|
| Kuye Temple Prayer Beads | Summons 3 bronze monks for up to 15 seconds; costs 2 charges per cast; cannot be stacked — casting again wipes the ones already out |
| Thread Ball +1 | Summon damage and summon Sha-Chi damage +100% |
| Puppet Wooden Heart +1 | Summon duration +50% |
| Green Serpent Brew | Clears all status effects, +80% status resistance for 25 seconds, restores 40% HP over the duration |
Those numbers are the whole argument: three summons hitting twice as hard for half again as long.
Mind the charges. Fully upgraded the beads hold six charges, and each cast costs two — that is three summons per attempt, not six. Spend them on the phases where the freeze actually lands.
Answer 2 — break the ice faster
If you would rather fight him straight, know this first:
Being frozen is not a stun you have to sit through. Rock the left stick left and right and the ice breaks far sooner. The game never explains this anywhere — not in the tutorial, not in a tooltip.
That one input changes the fight more than any accessory. Most deaths here are not from the freeze landing; they are from standing still and waiting out a stun that could have been cut short.
A resistance draught plus patience also gets there — the fight is survivable on raw mitigation — but it is the long way round.
Was this helpful?
Thanks for the feedback!